You will see performance drop when the CPU uses most of its resources. This happens because once the CPU reaches high temperature due to maximum usage, the processor lowers its performance to prevent itself from any damage. This means that the CPU will start thermal throttling. Now, without further delay, let us know more about the Diagnostic Policy Service.
What Is Diagnostic Policy Service?
The Diagnostic Policy Service works like a troubleshooting mechanism that detects and troubleshoots problems that Windows may face. This Service runs in the background and starts detecting any issues with the PC once the system loads OS into the primary memory. Without Diagnostic Policy Service, Windows cannot detect and fix issues with the OS or the system that may come up.
How To Check Diagnostic Policy Service CPU usage?
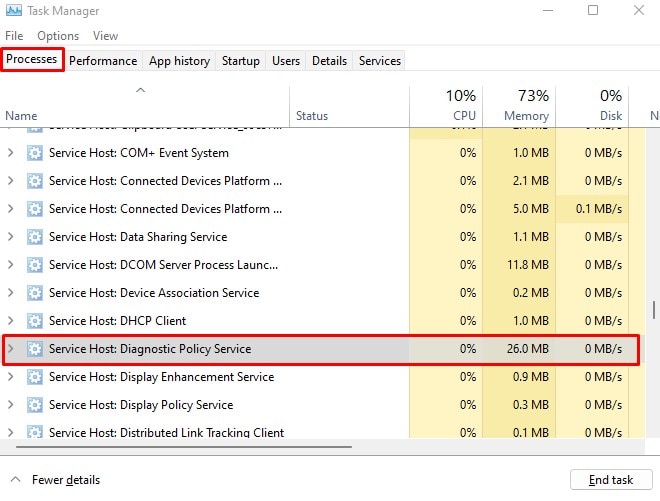
When the process runs, it should take ten to fifteen megabytes of memory, and the taskbar should indicate 0% CPU usage. However, it can take more depending on whether it is running. However, you should take necessary measures to remove the DPS service if it takes extreme CPU resources, memory, or disk usage. Follow the steps mentioned below to check the Diagnostic Policy Service resources in use. Here, you can see all the resources that this process takes. If you see that the Service is taking high CPU, memory, or disk usage, you need to perform the necessary steps to lower them.
What Makes Diagnostic Policy Service Use High CPU Resources?
When the Diagnostic Policy Service tries to fix any issues, it may use high CPU resources. However, it is not a problem unless the process constantly takes an extreme amount of CPU and memory resources.
How to Fix Diagnostic Policy Service High CPU Usage?
Before we get into the solutions, make sure you wait for a few minutes. As this is a genuine process that may use CPU resources when running, CPU resources may decrease once the process completes.
Corrupted System Files Windows not up-to-date SRUDB.dat file causing the issue A problem with the Windows Update
If it does not, perform the solutions mentioned below to fix Diagnostic Service High CPU Usage.
Disable Service
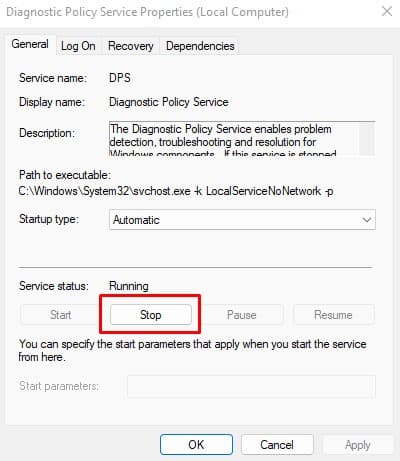
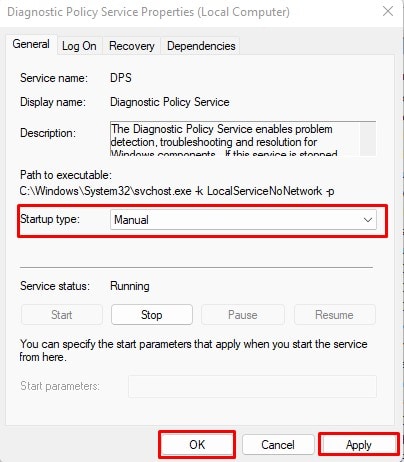
You have full control over the Windows service that runs in the background. You can choose whether the application runs on startup, start, or stop its process. Therefore, disabling the Diagnostic Policy Service will release any resources that this Service uses. Here are three different ways you can disable Diagnostic Policy Service. If one does not work, you can try the other methods.
Using Services
Follow the steps mentioned below to disable the Service using Services.
From System Configuration
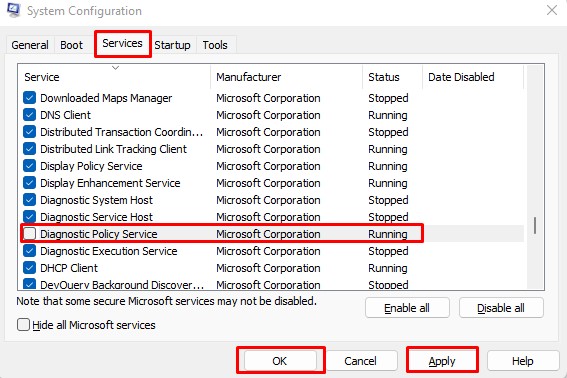
If Services does not allow you to disable this process, you can try disabling it from System Configuration.
From Registry Editor
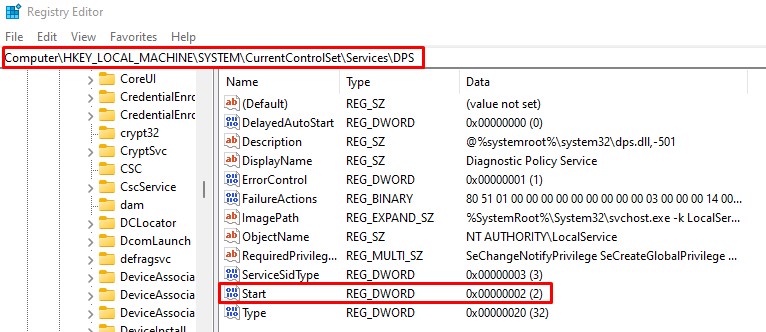
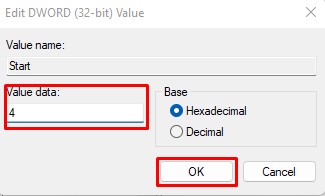
The Registry in Windows holds all computer settings. And this includes settings like whether a Service starts. Follow the steps mentioned below to disable the Diagnostic Service Policy from Registry Editor. Before making any changes, make sure to back up the registry. Setting the Value data to 4 will disable the process from starting automatically.
Delete SRUDB DAT File
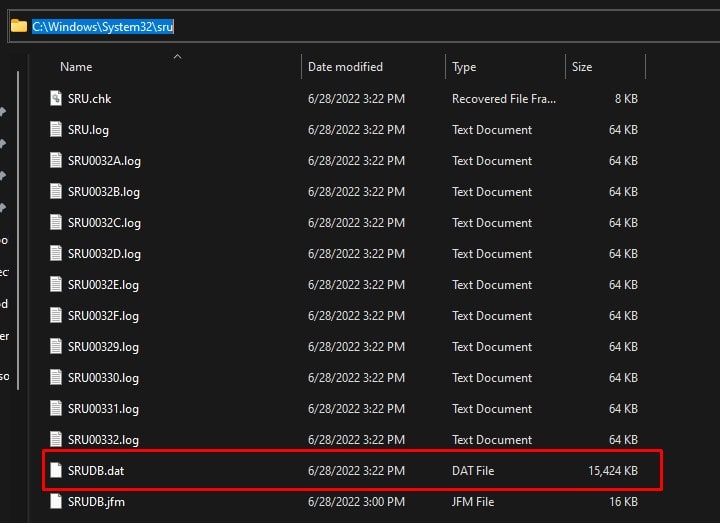
When Diagnostic Policy Service troubleshoots your system, it creates a log file named SRUDB.dat that stores all the details about the error and fixes. This file may take a lot of disk space, and accessing them may cause high CPU usage. You can delete this file to see if it fixes the issue. You do not need to worry, as the Diagnostic Policy Services will automatically create this file once the Service starts. However, the OS will not let you delete the file if you have Diagnostic Policy Service running in the background. Therefore, you need to stop the Service before you delete the file.
Change Power Plan
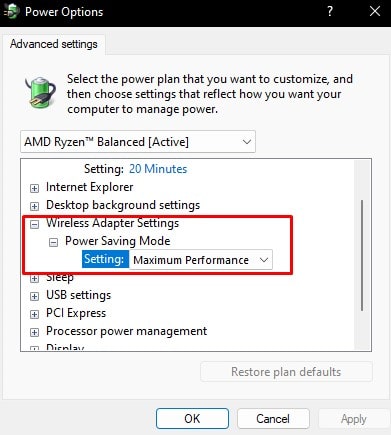
On a laptop, some services may malfunction if some devices’ power mode is not on maximum performance. Try changing this setting to see if the Diagnostic Policy Service uses fewer CPU resources.
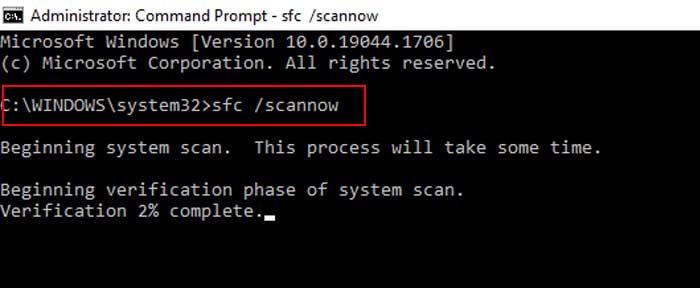
Run SFC and DISM
The SFC (System File Checker) scans and repairs any corrupted system files, whereas the DISM (Deployment Image Servicing and Management) scans and restores the Windows image. As all the Services files and folders are located inside the system file, running these commands may fix any of its corrupted files that may have been causing the high CPU usage issue.
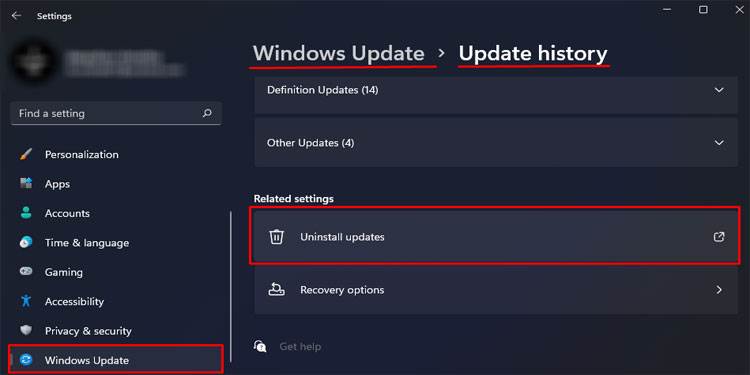
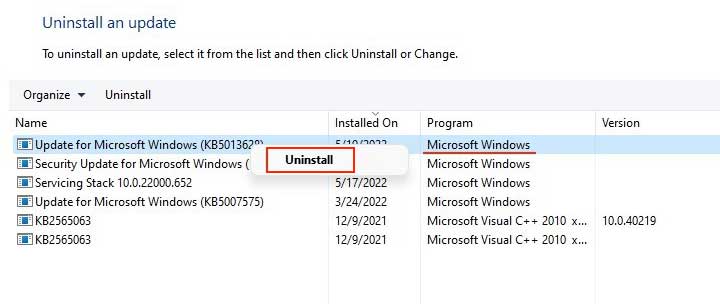
Roll Back/Update Windows
Since the Diagnostic Policy Service is a Windows process and not a process running from a third-party application, it can be that a recent Windows update started the high usage issue. If you have recently updated Windows and you face high CPU usage, you can uninstall the recent Windows Update.
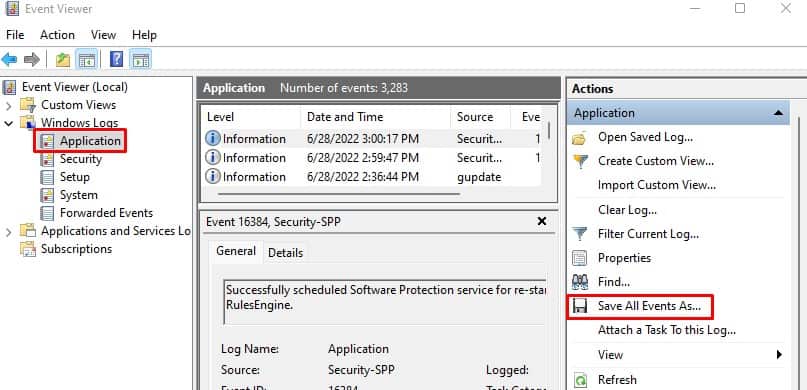
Clear Event Viewer Log
The event viewer logs any errors and warnings when the system runs into one. When this error log builds up, it may cause issues when the Diagnostic Policy Service tries to access the event log. To fix this, you need to clear the Event Viewer Log.
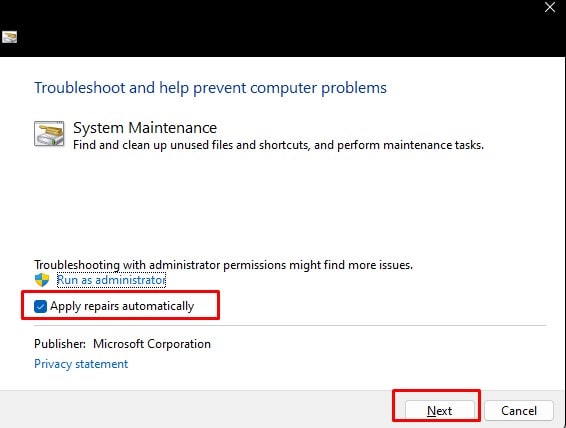
Run System Maintenance Troubleshooter
If none of the solutions works, you can try running the system maintenance troubleshooter to detect and fix any issues with the system. Even if it cannot fix the issue, it may be able to determine what’s wrong with the system.